Creating your own lip color blends creativity, control, and the fun of customizing products that suit your skin tone. This DIY Maroon Lipstick: Step-by-Step Guide to Creating the Perfect Shade explains how to craft a rich maroon pigment at home using simple ingredients, even if you have never mixed makeup before. The focus is bold, wearable maroon shades that feel luxurious and perform like a high-end product.
Understanding the Beauty of a Maroon Lip
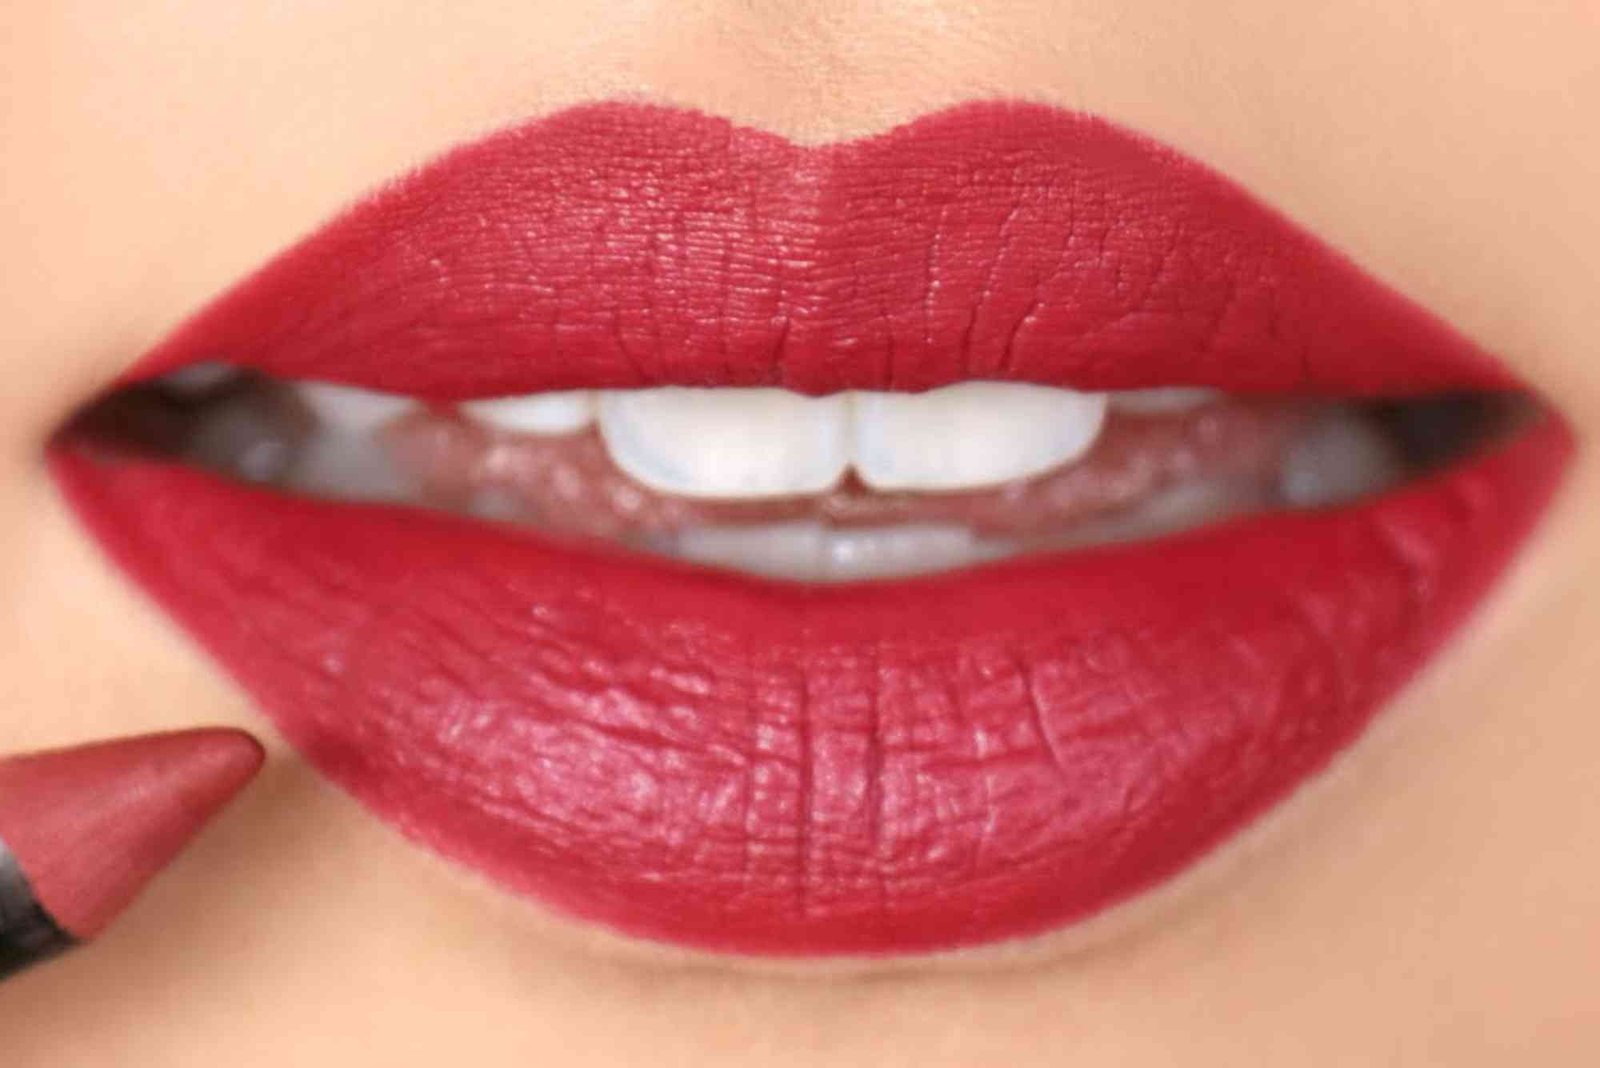
Maroon lipstick offers depth and sophistication. The shade sits between berry and wine, with a balance of red, blue, and brown tones. Makeup artists often choose maroon for fall and winter looks, though it works year-round when paired with minimal eye makeup and glowing skin. A custom formula helps you avoid store-bought shades that may be too purple, too brown, or too bright.
Choosing the Right Base Ingredients
A smooth, creamy lipstick needs a balanced base. Beeswax gives structure, oils add slip, and butters offer cushion. Natural choices like shea butter, coconut oil, and sweet almond oil create a soft glide on the lips. A solid wax-to-oil ratio prevents crumbling or melting.
Pigment is where maroon magic happens. Cocoa powder can deepen tone. Beetroot powder adds red warmth. A touch of purple or brown eyeshadow can shift undertones if you prefer a vampy finish or a warm wine shade. Using small amounts of cosmetic-safe mica helps achieve a professional satin finish without a gritty texture.
Melting and Mixing for a Smooth Formula
Work slowly and melt your wax and butter over gentle heat. A small heat-safe bowl over a simmering pot ensures even melting without scorching. Stir until the texture looks silky and fluid. Add your chosen oils once melted, then remove from heat so pigments blend evenly without breaking down delicate plant-based colorants.
Blend pigments gradually. Add a small pinch, mix, test, then adjust. Building color step by step prevents muddy tones. Stir until the blend looks consistent, because uneven mixing causes streaking on the lips. If you want more depth, add brown pigment. For a cooler berry vibe, add a dab of purple. Keep testing the color against your skin or on a white paper swatch to observe undertones.
Customizing the Perfect Maroon Undertone
The perfect maroon shade depends on skin tone and personal taste. Warm complexions often enjoy maroon shades with a touch of copper or chocolate. Cool complexions look stunning with berry or plum hints. Neutral complexions can wear almost any maroon if pigment proportions stay balanced. If your shade turns too bright, a hint of charcoal or brown warms and deepens the tone. If too dull, add a small touch of red for brightness. Maroon thrives on contrast, so layering pigment thoughtfully matters more than quantity.
Pouring and Setting Your Lipstick
Once the shade looks right, pour the mixture into a sanitized lip balm tube or small metal tin. Work fast, since wax thickens quickly as it cools. Let your lipstick set at room temperature so texture stays smooth and prevents cracking. Avoid refrigeration at first so oils and waxes stabilize evenly.
Achieving a Long-Wearing Finish
A long-lasting maroon lip depends on formula texture and application technique. When creating your product, a touch of thick castor oil helps pigments cling to lips. A little beeswax also boosts staying power. To apply, exfoliate lightly, moisturize, and dab a thin layer first. Blot, then apply a second layer. This technique avoids patching and makes the color richer.
Ensuring Safe and Clean DIY Makeup Practices
Sanitize tools before mixing. Use cosmetic-grade pigments when possible. Natural powders like beetroot are safe, but storing them incorrectly may shorten shelf life. Avoid sharing your DIY lipstick to reduce contamination. Always perform a patch test to avoid irritation, especially with plant colorants or essential oils.
Troubleshooting Common Shade Issues
Sometimes maroon leans too purple or brown. Adjust by shifting small pigment amounts. When texture feels grainy, remelt gently and stir longer. If the lipstick feels greasy, increase wax slightly. If it feels too stiff, add a small amount of oil. Results improve over time as you understand ingredient behavior, so note ratios for future batches.
Expert Tips for Pro-Quality Lips
A maroon lip becomes more striking with clean lip lines. Use a brush for precision. Powder around the edges prevents feathering. For a soft, blurred look, apply pigment with your fingertip and blend outward. For a glossy maroon finish, dab oil or clear gloss over your color. Wearing maroon during daytime becomes easier when paired with neutral blush and subtle brows.
Internal Resources to Explore
If you enjoy making beauty products at home, you can learn more at “DIY Maroon Lipstick: Step-by-Step Guide to Creating the Perfect Shade” inside the Beauty & Fashion category at duckyinfo.com:
Try a different homemade project like the Related Beauty & Fashion article on how to combine Vaseline and lipstick to create lip balm:
For curious minds who love deep-dive tutorials and skill-building guides, you can also Learn more at:
FAQs
Can I make maroon lipstick without beeswax?
Yes. Replace beeswax with candelilla wax or soy wax. These plant waxes offer firmness, though they set slightly harder, so adjust with extra oil if needed.
How do I make my DIY maroon lipstick last longer?
Apply in thin layers, blot between coats, and use a brush for precision. A small amount of castor oil in the formula improves longevity.
Can I use food coloring to make lipstick?
Liquid food colors do not blend well with oils and waxes. Stick to natural powders or cosmetic pigments for better blending and staying power.
How do I lighten a maroon shade that turned too dark?
Add a tiny amount of red or pink pigment. Blend thoroughly before testing. Adjust gradually until balance returns.
Is homemade lipstick safe for sensitive skin?
Yes, if you choose hypoallergenic ingredients. Always patch-test first and avoid fragrances or strong essential oils if your skin reacts easily.
A handmade maroon lipstick allows total control over undertone, texture, and richness. By mastering melting, pigment blending, and shade correction, you can create a luxurious color that suits you perfectly. Practice refines technique and helps you discover ratios that work best for long-wearing comfort. Continue exploring natural beauty projects and enhance your makeup routine with personal creativity. Begin experimenting today and craft your signature maroon shade. If you enjoyed this DIY Maroon Lipstick: Step-by-Step Guide to Creating the Perfect Shade, try another beauty project and share your results to inspire others to embrace custom beauty.